Tuesday, December 8, 2009
Holiday Eggnog Cheesecake
Serves 8 to 10
FOR THE CRUST
2 cups graham cracker crumbs
¼ cup granulated sugar
6 tablespoons unsalted butter, melted
FOR THE FILLING
3 (8 oz.) packages cream cheese, room temperature
1 cup granulated sugar
1 teaspoon vanilla extract
2 large eggs, room temperature
3 tablespoons all-purpose flour
1 cup best-quality eggnog
2 Tablespoons brandy, dark rum, or Cognac
1½ teaspoons freshly grated nutmeg
FOR THE WHIPPED CREAM
1 cup heavy whipping cream
1 teaspoon pure vanilla extract
¼ cup granulated sugar
½ teaspoon freshly grated nutmeg
Preheat oven to 325 degrees.
Pour graham cracker crumbs into a 9 inch-diameter springform pan; add butter and stir to mix. Press mixture evenly over bottom and ½ inch up side of pan. Bake crust for 10 minutes. Remove from oven and cool completely. Increase oven temperature to 425 degrees.
In the bowl of a freestanding mixer with paddle attachment, beat cream cheese and sugar on medium speed until smooth. Add vanilla extract and mix until incorporated. Add eggs 1 at a time, beating well after each addition and scraping down inside of bowl as needed. Mix in flour, eggnog, brandy, and nutmeg until just incorporated. Pour batter into cooled, crust-lined pan and bake for 10 minutes. Reduce oven temperature to 250 degrees and bake for 35 to 40 minutes, or until cake has a slight jiggle in the middle, and is slightly firm to the touch.
Run a thin-bladed knife between cheesecake and pan rim. Put cheesecake on a rack and let cool completely. Cover and chill until cold, at least 3 hours.
Remove pan rim. If any moisture has collected on cake, gently blot dry with a paper towel. Cut cake slices with a serrated knife, running knife under hot water and wiping clean after each slice.
To whip the cream; in a small bowl, whisk together cream, vanilla and sugar until medium peaks form. Dollop whipped cream onto cheesecake and dust with remaining ½ teaspoon nutmeg.
Saturday, November 28, 2009
That's the Spirit! The 10 (Unbreakable) Commandments of the Holiday Cocktail Party

The cocktail party is a great way to entertain a large group without breaking a sweat. They’re much easier to pull off than a dinner party and so much more fun! While cocktail parties are meant to be more loose and casual than a sit down affair, there are a few key things to remember that will guarantee your soiree is a smash.
Commandment #1: Send invites early!
At least 3 weeks before your party if possible. It’s a busy season for everyone and you want to give your friends (and yourself) time to plan. Cocktail parties, unlike those wild college keggers, have a beginning and ending point, usually about 2 hours in length between 6PM and 10PM. Be sure to specify times on your invitations.
Commandment #2: Invited guests: pay attention!
If you have been invited to a holiday party and have been asked to RSVP, DO IT! The sooner the better. As a host there is nothing more maddening than not knowing how many people are actually coming to your party and having unexpected last minute arrivals. While the old adage “the more the merrier” is always true, be a gracious guest and let the host know in advance that you’re coming. That way there will be enough food and drinks for you and your entourage.
Commandment #3: Use some decorating cents!
You don’t have to spend a fortune or 3 days decorating for a party, but you want it to look like you put some effort into it. Start by clearing away the clutter (that’s what closets are for!) to make way for guests. Decide on a place to stash coats and bags as guests arrive. Fresh flowers are always a good idea. Create a festive mood by choosing a lively color scheme for table tops, plates and napkins. Streamlined strands of inexpensive white lights add a beautiful touch to a room. Don’t forget the bathroom! Scented candles, an elegant bottle of hand soap, extra toilet paper and a basket of high-quality napkins or paper towels make guests feel pampered.
Commandment #4: Lighting is everything!
You’d be surprised how many people forget about this all important detail. There are a few simple things you can do to transform your living room into party central: Invest in inexpensive dimmers for your lamps. If that’s not an option, try pink light bulbs. Don’t laugh! You’ll look hotter, trust me. Man discovered fire so take advantage of it! Candles are a quick way to lend a warm glow to a party. Try placing loose clusters of votives around the room. Remember, there’s a reason why bars are dark and swanky lounges have so many candles everywhere. It’s sexy, makes everyone look better and no one wants to feel like they’re partying in a supermarket!
Commandment #5: Music moves your party!
So do put some serious thought into your soundtrack. A few days ahead put together your iPod playlist or make mix cds. Keep the energy up and don’t be afraid to mix genres, but make sure the mood of the songs blend well together. See to it that the music isn’t too loud or too soft. You don’t want guests screaming to talk to each other. On the other hand, make sure they’re not straining to hear “Grandma Got Run Over by a Reindeer,” either. Which reminds me: Christmas music is fine, but please don’t play it all night long. We’ve all been forced to listen to it in every retail store since late October, so give your guests a break.
Commandment #6: Break the ice!
Make sure your guests have a drink in their hand no more than five minutes after they arrive. For many, socializing with a room full of strangers can be more stressful than being Sarah Palin in that recent Oprah interview! The simple act of holding a drink gives them a “prop” and something to do with their hands. As the host it’s your job to ease them in by introducing them around to those they haven’t met and point out an interest or a hobby they may have in common.
Commandment #7: Keep ‘em moving!
The entire point of a cocktail party is to mingle. To encourage that behavior, set up your bar and your buffet table on opposite ends of the room (or in a different one all together). That way you don’t end up with traffic jams and a huge cluster of people in one spot. Also, sitting down is a “no no!” To keep the energy up and the party moving only provide half as many seats as you have guests. Besides, we all look thinner and more elongated when we stand.
Commandment #8: No more than a mouthful!
This may sound obvious, but since it’s a cocktail party (which implies: drink in hand at all times) you only have one hand free for noshing. To that end, make sure that the food you choose to serve can be eaten accordingly. You’d be shocked at how many would-be-hosts never consider this detail. I actually went to a cocktail party once where the host served a spiral cut ham! Now don’t get me wrong, I’m all about a good Honeybaked, but there weren’t even eating utensils provided. Hello! Think it through, people. The rule is simple: One-handed, bite size (okay, maybe two bites!) morsels that can be handled gracefully while sipping a festive Pomtini (see recipe below).
Commandment #9: Make your party DIY!
Have bottles of wine at the ready, along with beer and sodas (for the designated drivers) chilling on ice. Set up the bar with pre-made pitchers of your party’s signature drinks (I always choose 2 and keep more on standby), along with a big bucket of ice, cocktail shakers and drink garnishes. This is a great way to get guests involved in the party and not get stuck playing mixologist all night. Just be sure to replenish pitchers and ice as they dwindle. Multiply number of guests times 3 to determine how many glasses you’ll need.
Commandment #10: Be a guest at your own party!
This is perhaps the most important commandment of all. It’s show time so no more stressing about the little details! You’ve invited people you love. You’ve taken care of every detail. Everything looks amazing. Take a deep breath before you open the door to your first guest. Pour them (and you) a well-deserved cocktail and go mingle. Happy Holidays!
1 ½ pounds whole, unsalted almonds (or your favorite nut)
½ cup granulated sugar
¼ cup water
½ tablespoon dried grated orange peel (available on spice aisle)
¼ teaspoon ground cinnamon
1/8 teaspoon ground ginger
1/8 teaspoon ground cloves
Pinch of nutmeg
In a large, heavy skillet over high heat, combine the sugar, water, orange zest, cinnamon, ginger, cloves and nutmeg. Bring to the boil and stir until sugar dissolves. Add the nuts to the pan and stir to coat evenly. Continue to stir until all the liquid has evaporated. Spread nuts on a parchment lined sheet pan and allow to cool.
Cheeseburger Sliders
FOR THE BUNS
2 (11 ounce) packages refrigerated crusty French bread dough (Pillsbury brand)
1 large egg yolk plus one tablespoon water lightly beaten, for egg wash
2 tablespoons sesame seeds
FOR THE BURGERS
2 to 3 tablespoons good olive oil, for pan searing
2 large egg yolks, lightly beaten
2 tablespoons steak sauce
1 ½ tablespoons Montreal Steak Seasoning
1 ½ pounds ground sirloin
6 slices deli-style sharp cheddar cheese, each cut into 4 equal squares
4 small plum tomatoes, thinly sliced
Green leaf lettuce, torn to fit the burgers
FOR THE SPECIAL SAUCE
¼ cup good quality mayonnaise
¼ cup ketchup
Kosher salt & freshly ground pepper, to taste
Preheat the oven to 350 degrees.
Line a sheet pan with parchment paper and set aside. Cut each package of bread dough into 12 equal pieces and roll each piece into a ball about the size of a “golf ball.” The elasticity of the dough makes it a bit of a struggle to keep it round. You may have to beat it into submission. Don’t be afraid to show it who’s boss. Place the newly subservient dough on prepared sheet pan and brush with the egg wash and sprinkle with sesame seeds. Bake in the center of the oven for 22 to 24 minutes until golden brown. Remove to a rack and cool completely.
Preheat olive oil in a medium skillet over medium-high heat until hot.
Meanwhile, to make the burgers, whisk together the egg yolks, steak sauce and grill seasoning in a medium bowl and add the ground sirloin. Gently combine with your fingertips being careful not to overwork the meat. Using approximately 2 tablespoons of the meat mixture, carefully roll into meatballs and press between your palms to flatten into a small patty. Pan sear until cooked through to desired doneness, about 3 minutes on each side. Place a piece of cheese on each patty and tent loosely with a piece of foil to melt cheese.
To assemble the burgers, cut each bun in half crosswise and place a teaspoon sized dollop of the special sauce on the bottom of each. Top with the hamburger patty, tomato slice, a piece of lettuce and the bun top. Skewer each mini cheeseburger with a festive toothpick to hold together and serve immediately.
Nonstick (butter flavored) cooking spray, for muffin pans
¼ pound smoked deli ham, finely chopped
¼ cup Fontina cheese, finely grated
3 tablespoons fresh chives, chopped
8 large eggs
2 tablespoons heavy cream
Kosher salt & freshly cracked black pepper, to taste
Preheat oven to 375 degrees.
Spray the muffin pan(s) lightly with nonstick spray. In a small bowl lightly toss together the ham, cheese and chives. Fill each muffin cup with the ham and cheese mixture dividing evenly. In a 4 cup glass measuring cup, whisk together the eggs and the cream and season with salt and pepper. Pour the egg mixture into each cup until just even with the rim. Bake until frittatas are set, 10 to 12 minutes. Serve warm or at room temperature.
Chicken Satay with Spicy Peanut Dipping Sauce
Serves 4
FOR THE CHICKEN
½ cup coconut milk
1 tablespoon fish sauce (nam pla or nuoc nam, available on Asian aisle of grocery store)
2 tablespoons freshly squeezed lime juice
2 teaspoons sambal (hot chili paste, available on Asian aisle of grocery store)
1 teaspoon brown sugar
1 tablespoon fresh cilantro, chopped
2 tablespoons fresh ginger, finely grated
½ teaspoon ground turmeric
Kosher salt and freshly ground black pepper, to taste
1 pound chicken tenders
Bamboo skewers, soaked in water
FOR THE DIPPING SAUCE
1 cup smooth natural peanut butter, well stirred
½ cup chicken stock
1/4 cup unseasoned rice vinegar
3 tablespoons dark brown sugar
2 tablespoons tamari soy sauce
2 tablespoons fresh ginger, grated
2 teaspoons sambal (hot chili paste)
1 teaspoon turmeric
1 tablespoon dry roasted unsalted peanuts, chopped, for garnish
In a medium bowl combine the coconut milk, fish sauce, lime juice, sambal, brown sugar, cilantro, ginger, turmeric and season with salt and pepper. Pour marinade over the chicken tenders in a heavy gallon sized Ziplock bag, which in my opinion is the easiest and best way to marinate meat. Marinate for at least 30 minutes at room temperature, or even better for several hours in the refrigerator. The longer the meat swims in the marinade the more flavorful it will be.
Meanwhile, in a small bow, whisk together the peanut butter, chicken stock, rice vinegar, brown sugar, tamari, ginger, sambal and turmeric. Garnish with chopped peanuts.
Preheat an indoor grill pan or outdoor grill to high.
Thread the chicken tenders onto the bamboo skewers and grill until chicken is cooked through, about 2 to 3 minutes per side. Serve immediately with spicy peanut dipping sauce.
Serves 8
1 (4-pound) box rock salt
16 uncooked, unpeeled large shrimp
1/3 cup dry white wine
2 tablespoons fresh lemon juice
2 cloves garlic, minced
1/2 cup (1 stick) unsalted butter, chilled, diced
Kosher salt & Freshly cracked black pepper, to taste
1 tablespoon Italian parsley, chopped
Preheat the oven to 500 degrees.
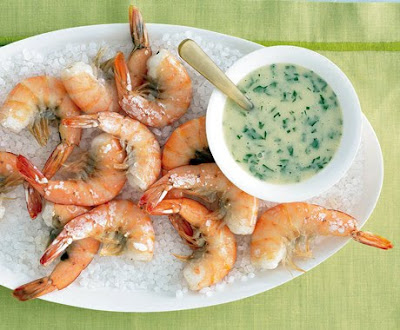
Spread salt in 13x9x2-inch baking dish. Arrange shrimp in single layer on top of salt. Roast shrimp on salt until just opaque in center and shells are pink, 6 to 7 minutes. If you're unsure of the shrimps doneness, simply cut into one and be sure that it's lost its glassy middle.
Bring the wine, lemon juice, and garlic to a boil in a medium saucepan over medium-high heat until liquid is reduced to 1 tablespoon, about 10 minutes. Remove from heat. Add a few pieces of butter; whisk until creamy. Return pan to low heat. Add a few more pieces of butter; whisk until smooth (do not let mixture boil). Continue whisking in butter, a few pieces at a time. Stir in parsley; season with plenty of salt and pepper. Let stand while shrimp finish cooking.
Transfer sauce to bowl and serve shirmp on a fresh bed of rock salt for presentation.
Smoked Salmon Blinis

Serves 8
1 package of good quality smoked salmon, thinly sliced
1 package frozen blinis (available at gourmet markets and in SoCal, Gelson’s)
½ cup crème fraiche or sour cream
Fresh dill or chives, chopped, for garnish
Preheat the oven to 400 degrees.
Arrange the blinis in a single layer on a baking sheet. Bake according to package directions for 4 minutes. Allow the blinis to cool slightly and top each one with a small dollop of crème fraiche, a piece of smoked salmon and garnish with a sprig of fresh dill. Serve immediately.
Pomtini
3 ounces good vodka
3 ounces pure pomegranate juice
1 ½ ounces triple sec
1 ½ ounces freshly squeezed lime juice
2 tablespoons simple syrup*
Pour vodka, pomegranate juice, triple sec and lime juice into a cocktail shaker. Tumble in a handful of ice and shake vigorously. Strain into a chilled martini glass and let the party begin!
*Simple syrup is incredibly, well, simple to make. Combine 1 cup of granulated sugar with 1 cup water. Bring to the boil, stirring until sugar has dissolved. Allow to cool and store in the refrigerator.
Green Apple Martini
3 ounces good vodka
3 ounces Apple Pucker
1 ½ ounces sweet & sour mix
1 ½ ounces 7-Up
Green apple, thinly sliced, for garnish
Pour vodka, Apple Pucker, sweet & sour and 7-Up into a cocktail shaker. Tumble in a handful of ice and shake vigorously. Strain into a chilled martini glass and float a thin slice of green apple on the top. Cheers!
VARIATION:
Caramel Apple Martini: Add 1 ½ ounces of caramel flavored syrup to the mix before shaking.
For a little extra color add a splash of grenadine syrup after straining into the glass, but don’t stir! Otherwise, you’ll just end up with a mottled mess. The syrup will settle to the bottom and add an extra layer of color and flavor. Garnish with a maraschino cherry.
Mini Cookies & Milk Shots
1½ cups cold milk
Assorted mini cookies (Oreo, Nutter Butters, Milano, Chocolate Chip, etc.)
Fill 2 ounce shot glasses with milk and place on a tray next to mini cookies. The perfect sweet ending to a holiday cocktail party.
Wednesday, November 18, 2009
The Beauty of the Feast: How to Cook Thanksgiving Dinner at Competition Level, even if you Burn Water!
Thanksgiving conjures up two thoughts for me: one of warm, fuzzy splendor and one of sheer panic. The first: a beautiful feast lovingly prepared and spread out on gorgeous, crisp linens, the turkey itself the regal, bronzed centerpiece of a relaxed and wonderful day spent with family and friends, while the aroma of perfectly spiced pumpkin pie floats through the house. It’s too idyllic for words, like something out of a Norman Rockwell painting.
Then, of course, the record scratches in the soundtrack of my mind and I quickly come crashing back to reality and remember what it’s really been like so many Thanksgivings before: Me, standing in the midst of chaos, panic-stricken, with giblet gravy splattered across my shirt, the smoke alarm going off, me trying to cook (or rather, trying not to burn) a picture-perfect meal for a house full of eager and hungry guests. All the while I’m fending off hyperventilation and a full-blown anxiety attack that leaves me teetering on the verge of a nervous breakdown, wandering the streets, all wild-eyed and whacked, babbling incoherently about mashed potatoes gone horribly wrong! It’s enough to make me vow never to put myself through that again. I need a stiff drink just thinking about it!
But inevitably the next year rolls around, and like childbirth (so I’m told) I forget the agony of the past, telling myself it wasn’t quite as bad as I remember. After all, no one was hurt! And before I know it, I find myself pondering this year’s Thanksgiving menu once again. This time, however, unwilling to let history repeat itself, I’m applying an altogether different plan of attack.
Like so much in life, the key to a successful Turkey Day lies in planning ahead. So this year I’m starting early in both the planning and preparation. I'm not doing an entire turkey, instead, I'm sticking to the breast. It's everyone's favorite anyway. Then, on the day of, there is little more to do than roast the turkey breasts, light a few candles, and eat myself into a tryptophan-induced coma. My game plan is simple as long as I (and you) remember three things:
1) Choose a foolproof menu that can (mostly) be made ahead
Menu
Cranberry Kir
Union Square Café Rosemary Cashews
Wild Mushroom & Barley Soup
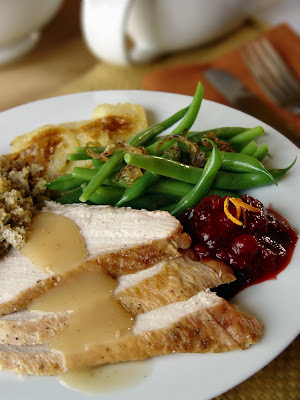
Herb Stuffed Turkey Breasts with Pan Gravy
Savory Herb & Gruyere Strata
Vanilla-Scented Cranberry Sauce
Steam-Sautéed Green Beans with Caramelized Shallots
Yukon Gold & Sweet Potato Gratin
Pumpkin Gooey Butter Cake with Cinnamon Whipped Cream
Up to one week ahead: Order the turkey breasts from the grocery store or butcher. Shop for nonperishable food items, beverages, and decorative elements like candles. Make rosemary cashews and store in an airtight container. Don't eat them all! Make iPod playlist for guests.
2 days ahead: Pick up the turkey breasts and other groceries; make the soup and the cranberry sauce.
1 day ahead: Caramelize shallots, wash and trim green beans, make Savory Herb & Gruyere Strata, Whip Cream, set table.
Thanksgiving morning: Choose a sassy outfit for yourself. Take a deep breath and relax. You can do it!
2 hours ahead: Prepare, stuff, and roast turkey breasts. Bring cranberry sauce to room temperature.
1 1/2 hours ahead: Make potato gratin; bake along with the strata while turkey breasts are resting.
30 minutes ahead: Gently reheat soup.
15 minutes before guests arrive: Turn on music, light the candles, pop the champagne cork, put out cashews, and steam sauté green beans.
The rest of the day: Relax and give thanks.
 2 bottles good-quality champagne, well chilled
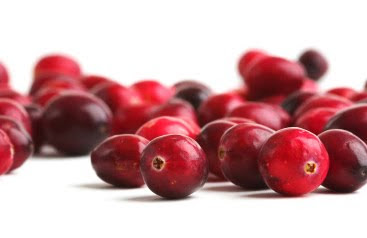
1 Bottle of pure cranberry juice Fresh cranberries for garnish
Fill a tall champagne flute 3/4 full with champagne. Top off with a splash of cranberry juice and garnish with cranberries. Cheers!
Union Square Café Rosemary Cashews
 1 pound dry roasted whole cashews, unsalted
1 tablespoon unsalted butter, melted
1 teaspoon kosher salt
2 Tablespoons fresh rosemary, finely chopped
1 tablespoon dark brown sugar
1/2 teaspoon cayenne pepper, or to taste
Preheat oven to 350 degrees.
Spread the cashews out on a sheet pan and toast them in the oven for about 6 minutes until they begin to smell nutty and take on a bit of color. Meanwhile, in a large bowl combine the melted butter, salt, chopped rosemary, brown sugar, and cayenne pepper. Stir to combine. When the cashews come out of the oven toss them thoroughly with the butter mixture to coat. Serve warm.
Serves 8
2 ounces dried porcini mushrooms
3½ cups hot tap water
¼ cup good olive oil
1 medium onion, chopped
2 medium carrots, peeled and diced
2 ribs celery, diced
1 fresh bay leaf
1 pound crimini mushrooms, cleaned* and sliced
2 teaspoons fresh thyme, chopped
Kosher salt & freshly cracked black pepper, to taste
1 quart beef stock
½ cup pearl barley
¼ cup flat-leaf parsley, chopped
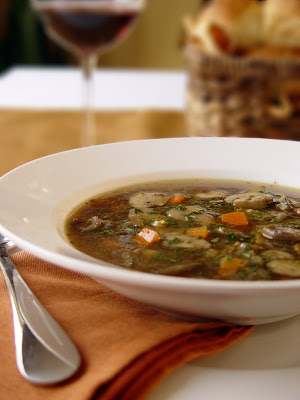
In a medium bowl, soak porcini mushrooms in hot water for 20 minutes. Meanwhile, in a large stock pot or Dutch oven, heat the oil over medium heat and sauté the onion, carrots, celery and bay leaf until softened, about 5 minutes. Add the crimini mushrooms and the thyme. Cook until the mushrooms soften and give off their liquid, about 5 or 6 minutes. Season with salt and pepper, to taste.
Fish the porcini mushrooms out of the soaking liquid with a slotted spoon and chop roughly. Strain the liquid through a fine mesh sieve or a piece of cheesecloth to catch any grit that has collected on the bottom of the bowl. Add the soaking liquid to the pot along with the beef stock and barley. Bring to a boil, reduce heat to a gentle simmer until the barley is tender, about 40 minutes. Stir in the parsley and serve immediately.
*Never run mushrooms under water. They’re like little sponges and will soak up all that liquid and become waterlogged. Simply wipe them with a damp cloth, or dust them off with a pastry brush.
1 lemon, zested
12 fresh sage leaves
Large handful fresh flat-leaf parsley
3 tablespoons extra-virgin olive oil, plus more for oiling pan
1 teaspoon kosher salt, plus more as needed
Freshly cracked black pepper, to taste
6 fresh bay leaves
4 tablespoons unsalted butter
2 boneless turkey breast halves, skin on (about 2 to 2½ pounds each)
1/4 cup dry white wine
2 to 3 cups chicken stock
Preheat the oven to 450 degrees.
Oil a roasting pan and set it aside. Put the onion and the lemon zest into the bowl of a food processor and blitz until fine. Add the sage, parsley, olive oil, and 1 teaspoon salt and pulse until it forms a coarse paste. Place 2 of the bay leaves and the butter into a small pan and heat over medium-low heat until the butter is bubbling. Remove from the heat and set aside.
Place the turkey breasts on a work surface. Carefully run your fingers between the skin and the flesh from one end, being careful not to pull it completely off, creating a pocket. Season the turkey breasts generously with salt and pepper. Stuff half of the herb paste under the skin of each breast, and spread it evenly under the skin. Transfer the breasts to the roasting pan, and slide 2 bay leaves underneath each one. (The heat of the pan will release the bay leaf oils and flavor the breast.) Using a pastry brush, baste the breasts with half of the bay butter. Place the turkey in the oven and roast for 20 minutes.
After 20 minutes, baste the turkey breasts with the remaining butter, and decrease the oven temperature to 400 degrees. Roast for an additional 25 to 30 minutes, until cooked through, and a thermometer placed in the thickest part of the breast registers 160 degrees.
Remove turkey breasts from the oven, transfer to a platter, cover, and let rest for 10 minutes loosely tented under foil before carving. Meanwhile, to get on with the gravy, place the roasting pan over the burner on medium heat. Melt the butter and sprinkle the flour over the pan juices, and cook, stirring, for a few minutes to make a roux. Add the wine, and scrape the pan to lift the bits that are stuck to the bottom. Cook for a minute to burn off the alcohol, then, while stirring, pour in the chicken stock. Bring to a simmer, and stir until thickened. Season with salt and pepper and add the sage. Slice the turkey breast on the diagonal, and serve with warm gravy.
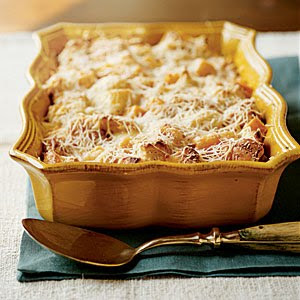 Serves 8
¼ cup unsalted butter, plus more for buttering pan
2 shallots, sliced
1/2 cup dry white wine
6 large eggs
2 1/2 cups heavy cream
1 teaspoon kosher salt
1 teaspoon white pepper
2½ cups Gruyere cheese (about 10 ounces)
2½ cups Swiss cheese (about 10 ounces)
¼ cup fresh chives, chopped
¼ cup fresh sage, chopped
¼ cup fresh marjoram, chopped
1 pound loaf of day old French bread, cut into ½-inch pieces
Preheat oven to 350 degrees.
Liberally butter a 7x11 inch glass baking dish and set aside. Saute shallots in butter until soft. Add wine and simmer for about 3 to 5 minutes to reduce the wine. Set aside.
Whisk eggs, cream, salt and pepper in a large bowl, add shallot wine mixture. Combine the cheese and herbs together. Add all but 1 cup cheese to the egg mixture then carefully fold in the bread pieces. Allow to stand a minimum of 1 hour in the refrigerator, or up to overnight.
Pour mixture into prepared pan and sprinkle with remaining cheese herb mixture. Bake bread pudding until golden and puffed, about 40 minutes. Cool 10 minutes.
Yukon Gold and Sweet Potato Gratin
4 tablespoons unsalted butter, room temperature
1 cup whole milk (scant)
1 large garlic clove, peeled and crushed
3/4 teaspoon. kosher salt
1/2 teaspoon freshly ground white pepper
1/8 teaspoon freshly grated nutmeg
3/4 pound Yukon gold potatoes
3/4 pound sweet potatoes or yams
1 1/2 cups heavy cream
Preheat oven to 425 degrees.
Liberally butter the bottom of a rectangular baking dish with half of the butter and set aside. Place a small saucepan with the milk, garlic, salt, pepper, and nutmeg over low heat while you set about peeling and slicing the potatoes. A mandoline is perfect for this, but I usually opt for a really sharp butcher knife, mostly because I'm too lazy to drag out and wash any extra equipment. Slice the potatoes about an eighth of an inch thick, discarding the smallest slices. Don't wash the potatoes after slicing them the surface starch is indispensable.
Evenly arrange the potatoes in the bottom of the baking pan, one overlapping row at a time. Layer the following row about a third of the way over the previous row. Alternate rows of sweet and Yukon gold potatoes. Continue until the baking pan is neatly paved. It should look something like a shingled rooftop.
Bring the milk to a boil, fish out the garlic clove, and pour the milk over the potatoes. Cover the pan with aluminum foil and bake in the middle of the oven for about 15 minutes until most of the milk has been absorbed. Meanwhile, set the cream over low heat and bring to a boil. Pour the cream over the semi-cooked potatoes and dot the entire surface with the remaining butter.
Continue to bake, uncovered, for another 20 to 25 minutes until the potatoes are golden brown and spotted with darker, crisp areas. The potatoes will be dotted with thickened cream, especially between the slices.Allow the gratin to rest for 10 minutes before serving.
 Serves 8 to 10
2 cups freshly squeezed orange juice
1 cup sugar, or to taste
2 whole vanilla beans, split lengthwise, seeds scraped out
2 (12 ounce) bags fresh cranberries
In a medium saucepan combine orange juice, sugar and vanilla beans, stir over medium heat until sugar dissolves. Add the cranberries and bring to the boil. Reduce heat and simmer until berries pop, about 10 minutes. Remove from heat and allow to cool to room temperature. Fish the vanilla bean out and scrape the seeds into the sauce and mix well. Discard the bean. Refrigerate until ready to use.
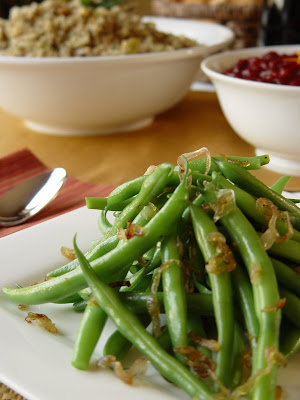 Serves 8
3 tablespoons good olive oil
6 large shallots, peeled & thinly sliced
2 1/2 pounds fresh green beans, cleaned and trimmed
1/3 cup water
2 tablespoons unsalted butter, room temperature
Kosher salt & freshly cracked black pepper, to taste
In medium skillet, heat oil over low heat. Add shallots and cook, stirring frequently, for 15 minutes or until soft and deep golden brown. Don’t rush this part. It really does take about 15 minutes to develop the sugars and caramelize the shallots. Trust me, your patience will be rewarded. They key to success is low and slow.
Meanwhile, as the shallots are cooking away, get on with the green beans. In a large saucepan over high heat, combine the green beans and water. Cover saucepan with a tightly fitting lid and resist the urge to lift the lid and peek until steam begins to escape around the edges of the lid, about 5 minutes. Remove lid and sauté until beans are crisp-tender, about 2 more minutes. Remove from heat, drain and toss with the butter, caramelized shallots and season with salt and pepper. Serve immediately.
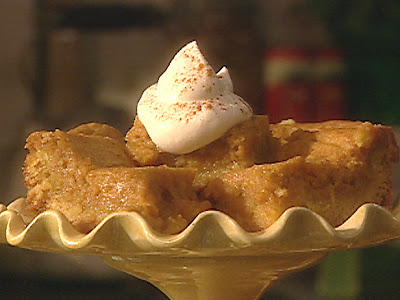 FOR THE CAKE
1 package Butter Recipe Golden cake mix
1 large egg
8 tablespoons unslated butter, melted
FOR THE FILLING
1 (8-ounce) package cream cheese, softened
1 (15-ounce) can solid pack pumpkin
3 large eggs
1 teaspoon pure vanilla extract
8 tablespoons unsalted butter, melted
1¾ cups confectioners’ sugar
1 teaspoon ground cinnamon
1 teaspoon freshly grated nutmeg
FOR THE CINNAMON WHIPPED CREAM
2 cups heavy cream
2 teaspoons pure vanilla extract
3 tablespoons sugar
1 tablespoon of cinnamon, or to taste
Preheat oven to 350 degrees.
Combine the cake mix, egg, and butter and mix well with an electric mixer. Pat the mixture into the bottom of a lightly greased 13 by 9-inch baking pan. To make the filling: In a large bowl, beat the cream cheese and pumpkin until smooth. Add the eggs, vanilla, and butter, and beat together. Next, add the confectioners’ sugar, cinnamon, nutmeg, and mix well. Spread pumpkin mixture over cake batter and bake for 40 to 50 minutes. Make sure not to overbake as the center should be a little gooey. Serve with fresh cinnamon whipped cream.
Monday, October 12, 2009
Winter Warmth: Soul-Soothing Comfort from the Kitchen
There are times in life when I seek solace from a harsh world purely through the means of butter, cream, and starch. Sometimes nothing else will do. It’s times like these when I just want to retreat into my shell, put on my fuzziest slippers and softest, most lived-in robe, and putter around the kitchen making something warm and soul-soothing. As clichéd as that sounds, it really is one of my guiltiest and most savored pleasures, and my preferred method of restoring balance and calm to my hectic life.
There’s something about a simmering pot on the stove that makes me feel all is right with the world. Especially when the end result is a big bowl of Hearty Winter Chili, topped with cheese and sour cream and accompanied by warm, tender corn bread, cooked the old-fashioned way in a cast-iron skillet. When I’m feeling particularly out-of-sorts, I find the meditative repetition of stirring a pan of Saffron Risotto for 20 minutes - the only way to achieve that melting creaminess - an almost Zen-like experience. Top it with juicy grilled shrimp and the dish becomes transcendent!
When I crave something just a little more exotic and worldly, but no less warming and gratifying, it has to be Indian Coconut-Chicken Curry, spiked with coriander, cumin, and creamy coconut milk. This dish can be made in minutes and tastes even better reheated the next day.
And of course, for many, the ultimate comfort food comes in the form of chocolate. Old-Fashioned Whoopie Pies have been a favorite of mine since childhood, and these dense chocolate cakes sandwiching a billowy layer of marshmallow cream are the ultimate sinful indulgence.
So the next time you need a break from the world, or just need to indulge in a little guilty pleasure of your own, you just may find it in a bowl of something warm and comforting made in your own kitchen. Lived-in robe and fuzzy slippers optional.
Serves 8
3 tablespoons extra-virgin olive oil
2 1/2 lbs. lean ground sirloin
1/4 cup dark chili powder
2 tablespoons grill seasoning
1 tablespoons ground cumin
2 tablespoons Worcestershire sauce
1 to 3 tablespoons hot sauce, to taste
1 large onion, chopped
4 garlic cloves, minced
2 large bell peppers, chopped
1/2 bottle beer (about 1 cup)
1 (14-oz.) can tomato sauce
1/2 cup smoky barbecue sauce
FOR GARNISH
Sharp cheddar cheese, grated
Sour cream
Scallions, thinly sliced
In a large stock pot or Dutch oven over medium-high heat, add olive oil followed by ground sirloin. Season meat with chili powder, grill seasoning, cumin, Worcestershire, and hot sauce. Break up the meat into small crumbles as it cooks.
Add onion, garlic, and bell peppers and cook until onions are translucent and soft, about 10 minutes more. Add beer and deglaze the pan, scraping up the browned bits from the bottom of the pan and allowing the alcohol to cook off. Add tomato and barbecue sauces and bring to a bubble. Let chili simmer 15 minutes. Adjust seasonings and heat level to your taste. Remove from heat and serve with your favorite garnishes.
Serves 10 to 12
 FOR CORN BREAD
1 1/2 cups white or yellow cornmeal
1/2 cup all-purpose flour
2 teaspoon baking powder
1/4 teaspoon baking soda
1 tablespoon. granulated sugar
1 1/2 teaspoon kosher salt
1/4 cup unsalted butter, melted
1 1/2 cups buttermilk
2 eggs
1 cup fresh or frozen corn kernels
2 tablespoon vegetable oil
FOR HONEY BUTTER
1/2 cup unsalted butter, room temperature
1/2 cup honey
Pinch of kosher salt
Preheat oven to 425 degrees.
In a large mixing bowl, whisk together cornmeal, flour, baking powder, baking soda, sugar, and salt. In a small bowl, whisk together melted butter, buttermilk, eggs, and corn, and fold into the dry ingredients, stirring until just combined.
Over high heat, add oil to cast iron skillet and heat until smoking. Quickly pour batter into the hot skillet and carefully and quickly transfer the skillet to the preheated oven.
Bake for 10 to15 minutes, or until corn bread is golden-brown around the edges and a toothpick inserted in the center comes out clean. The top should spring back when lightly pressed. Cut into wedges and serve slathered with honey butter.
Serves 6
1 large onion, thinly sliced
4 teaspoon finely chopped garlic
4 teaspoon finely chopped ginger
2 tablespoon ground coriander
2 teaspoon ground cumin
1/4 teaspoon turmeric
1/2 teaspoon cayenne pepper, or to taste
1/4 teaspoon freshly cracked black pepper, or to taste
1 1/2 teaspoons kosher salt
2 medium tomatoes, chopped
1/2 cup chicken stock
2 pounds boneless chicken, cut into 1 1/2-inch pieces
1/2 cup unsweetened coconut milk
1/4 teaspoon ground cinnamon
1/4 teaspoon ground cloves
1/3 cup chopped cilantro, for garnish (optional)
Steamed basmati rice, for serving
In a Dutch oven or enameled cast-iron casserole, heat oil, then add onion and cook until nicely browned around the edges, about 7 minutes. Add garlic and ginger and cook for 1 minute. Add coriander, cumin, turmeric, cayenne, and black pepper and stir for 1 minute. Add salt, tomatoes, and chicken stock and cook over medium-low heat, stirring constantly, until the tomatoes are softened. Add chicken and simmer uncovered, stirring occasionally, for 15 minutes.
Add coconut milk and simmer partially covered for another 15 minutes, or until the sauce thickens and the chicken is cooked. Add cinnamon and cloves and simmer another minute. Remove from heat and garnish with cilantro. Serve with steamed basmati rice.
Serves 4
5 cups chicken stock
1/4 cup olive oil, divided
1/4 cup unsalted butter, divided
1 large shallot, minced
2 cloves garlic, minced
1 1/2 cups Arborio rice
2 pinches saffron threads
2/3 cups dry white wine
1/2 cup freshly grated Parmigiano-Reggiano cheese
1/2 teaspoon kosher salt
1/2 teaspoon ground white pepper
FOR SHRIMP
1 pound large shrimp, peeled and deveined, tails on
1 teaspoon freshly squeezed lemon juice
2 tablespoon flat-leaf parsley, chopped
Preheat outdoor grill or indoor grill pan over high heat.
Heat chicken stock over medium-high heat until just below the boil. In a large sauté pan, heat 2 Tbsp. olive oil and 2 Tbsp. butter over medium heat. Add shallots and garlic and sweat until translucent, stirring constantly, about 3 minutes.
Add rice and saffron, turning to coat, and sauté until the edges of the rice begin to look slightly translucent, about 2 minutes. Add wine and cook until most of the liquid is absorbed and the pan is almost dry. Add one ladleful of hot stock, stirring constantly until liquid is almost absorbed. Continue adding stock, one ladle at a time, stirring each addition until the liquid is almost absorbed, about 22 to 25 minutes total. Stir in remaining butter and cheese and season with salt and pepper; cover.
Toss shrimp with remaining oil and season with salt and pepper. Grill shrimp until pink, opaque, and curled in on themselves, about 2 minutes per side. Spritz shrimp with lemon juice and parsley and serve over risotto.
Makes 8 pies
2 cups all-purpose flour
1/2 cup Dutch-process cocoa powder
1 1/4 teaspoon. baking soda
1 teaspoon kosher salt
1 cup buttermilk
1 teaspoon pure vanilla extract
1/2 cup unsalted butter, softened
1 cup dark brown sugar, packed
1 egg
FOR FILLING
1 cup (2 sticks) unsalted butter, room temperature
2 cups confectioners’ sugar
1 (7 oz.) jar marshmallow fluff
2 teaspoons pure vanilla extract
Preheat oven to 350 degrees.
Line two sheet pans with parchment paper.
In a small bowl, whisk together flour, cocoa powder, baking soda, and salt. In another small bowl, stir together buttermilk and 1 tsp. vanilla.
In a standing mixer fitted with a paddle attachment, cream together 1/2 cup butter and brown sugar until light and fluffy, about 3 minutes. Add egg, scraping down the sides of the bowl to combine. Reduce mixer speed to low and alternately mix in dry ingredients and buttermilk mixture in batches, beginning and ending with flour. Scrape down side of bowl occasionally and mix until smooth.
Using a 1/4-cup ice cream scoop, drop mounds of batter about 2 inches apart on prepared sheet pans. Bake in upper and lower thirds of oven, switching position of sheets halfway through baking, until tops are puffed and cakes spring back when touched, 12–13 minutes. Transfer cakes to a rack to cool completely.
To make the filling, cream together remaining butter and confectioners’ sugar until light and fluffy, about 3 minutes. Add vanilla and marshmallow fluff and continue beating until smooth and light, about 2 more minutes.
To assemble the pies, dollop a rounded tablespoon of filling on flat sides of half of cakes and top with remaining cakes.
Tuesday, September 29, 2009
Awaken Your Senses & Help a Worthy Food Charity Win $10,000!
It's official, fall is finally here! We're almost 30 days into the brrrrr months (Septembrrrr, Octobrrrr. You get the picture) and that means, roaring fires, my favorite old robe, comfy slippers and the return of the hot breakfast.
As excited as I am for the change of seasons (okay, I admit they don't actually change much in L.A, but let me have my moment) I'm even more excited to announce that Good Bite and I have teamed up with Quaker Oats to launch the Awaken Your Senses Challenge. It's a campaign that takes the favorite food memories of twelve of the nation's top food bloggers and allows yours truly to use them as inspiration to create twelve original Oatmeal Creations. And how cool is this... America (that's you guys!) gets to vote on the winner! But wait! It gets even better...
Every two weeks, a new round of videos will be posted where you can vote for your favorite. With each round, semi-finalists will be selected.
And the best part...
At the end of eight weeks the blogger’s video with the most votes wins! And $10,000 will be donated to their favorite food-related charity! So what are you waiting for? Head to YouTube.com/QuakerTalk and vote!
Tuesday, July 7, 2009
Life is Just a Bowl of...Cherry Garcia?

Forgive the obviousness of the title. Clearly the brain freeze that comes from nearly non-stop ice cream making (and eating) is getting to me, stifling my creativity for writing perhaps, while vehemently fanning the flames of an undying obsession. Let this also serve as my excuse for not posting in over a week, but I’m sure you’ll forgive me when you taste my latest creation. Well, my homage to a classic Ben & Jerry’s creation really. One inspired by the bountiful red cherries of the summer season.
When it first occurred to me to turn those ruby colored, jewel-like fruits into ice cream I decided to take my search online to find a published recipe for Cherry Garcia. I was disappointed to find that none of the recipes started with a cooked custard base, something I’ve extolled the virtues of before and have become almost evangelical about. I’m convinced it’s the only way to get that densely rich, über-creaminess that is paramount in great ice cream. So, heaving a heavy sigh I decided the only thing to do was to write a recipe of my own.
And so the journey began. As is my creative process, my kitchen cupboards were soon plastered with post-it notes filled with my nearly indiscernible scrawl as I mixed, whisked, scalded and stirred my way to the perfect custard base. Too many egg yolks and the ice cream tastes “eggy.” Too few and it’s not dense enough. 7 egg yolks I decided were the perfect amount. Now it needed just the right hit of sugary sweetness. I added sugar starting with less, tasting and adding more as I went until I’d achieved the perfect balance of sweet but not cloying. Whenever I write a recipe the biggest challenge is remembering to scribble down each addition on those post-it notes as I go, before I forget what I’ve done. As you can surely imagine this becomes an even bigger challenge when I’m writing cocktail recipes, but I’ll get to that another day. I decided that a bit of black cherry preserves would be just the thing to give extra cherry flavor and a rosy blush to the ice cream base. When I was satisfied with the proportions of tart and sweet I whisked the cream into very soft peaks and folded it into the cooled custard. This extra step of lightly whipping the cream only adds to the dreamy, cloud-like texture that is both light and dense at the same time. A culinary contradiction of the fondest sort!
After a 25 minute whir in the Cuisinart, the ice cream was at the glorious soft serve stage. This is exactly when you want to mix in the cherries and chocolate and where I stand hovering over the ice cream maker, spoon in hand, greedily shoveling big mouthfuls of the frozen ambrosia. I heave another heavy sigh, but this time it's full of deep and utter satisfaction.
Ah yes, life is indeed a bowl of Cherry Garcia.
Homemade Ben & Jerry’s Cherry Garcia
(With Two Flavor Variations)
Densely rich, über-creamy and studded with bits of fresh cherries and dark chocolate. Enough said.
Makes a scant 2 quarts
1½ cups whole milk
7 large eggs yolks
1 cup sugar
1 teaspoon pure vanilla extract
6 tablespoons black cherry preserves
1½ cups heavy cream, lightly whipped
4 ounces good quality dark chocolate, chopped
1 cup fresh cherries, pitted and chopped
Heat the milk in a pan, and while it’s getting warm, beat together the sugar and egg yolks and vanilla extract in the bowl of a freestanding mixer with a paddle attachment until the mixture is thick, pale yellow and falls back on itself in a ribbon, about 3 minutes. When the milk is just below the boil slowly drizzle it in a thin and continuous stream while whisking briskly so the egg is gradually warmed up. Return everything to the saucepan and cook while stirring with a wooden spoon. Make sure that you are constantly scraping the spoon across the bottom of the pan so the custard does not scorch. The custard is done when it has thickened slightly and can evenly coat the back of the spoon and when you run your finger along the back of the spoon and it holds the “line.” Don’t let the mixture come to a boil, or it may curdle.
Strain the custard into a metal bowl through a fine sieve to remove any bits of egg and stir in the black cherry preserves. Nestle the bowl of custard into a large bowl of ice water to cool more quickly. I do this because I’m incredibly impatient, but you could just put the whole thing in the fridge to cool completely. Lightly whip the cream until it holds a very soft peak and fold into the cooled custard. Continue stirring occasionally until mixture is cold, about 20 minutes.
Transfer the custard to an ice cream machine and freeze according to the manufacturer's instructions. When the ice cream is almost finished churning add in the chopped chocolate and the cherries to combine. Put the finished ice cream in a storage container and freeze until firm.
*Variations: This basic ice cream recipe is so versatile that you can add any flavor combinations you like to the base. Below are two of my favorites.
Toasted Coconut: Substitute 1 (15 ounce) can Coco Lopez Cream of Coconut (NOT coconut milk!) in place of the cherry preserves and 1 cup sweetened toasted coconut in place of the cherries and chocolate.
Peanut Butter Cup: Substitute 1 cup creamy peanut butter in place of the cherry preserves and 1 bag of Reese’s mini peanut butter cups, chopped, in place of the cherries and chocolate.
Print Recipe
Wednesday, June 24, 2009
The Future Called & I Let It Go To Voicemail

I have an uncanny knack for regularly arriving at the future slightly ahead of the rest and waiting for them to catch up. At the risk of sounding (even more) arrogant, I’ve always fancied myself a bit of a Jetson living in a world of Flintstones when it comes to anything even remotely pop culture related. Case in point: I actually cancelled my subscription to US Weekly because I noticed the latest issue at the grocery store checkout several days before it arrived in my mail box! Dear US Weekly: Celebrity news has a shelf life! You know when you hear a song on mainstream radio and you announce that you really like it and someone rains on your parade by piping up, “Oh that tired old song?! I had the dance mix import from the UK nine months ago!” Subtext: You’re sooo 2000-LATE! I’m totally that guy! Obnoxious? Maybe. Okay, definitely, but I’ve always loved being “in the know” at least 15 minutes before everyone else catches on. Call it a personality quirk or a design flaw, but I can’t help it! It’s no wonder one of my favorite moments in last year’s Sex and the City movie had the girls sitting around a table sipping cosmos in a chic Manhattan restaurant and Carrie asking, “Why did we stop drinking these again?” Without missing a beat Samantha replied, “Because everyone else started.” Enough said.
And that brings me to the last few months of my life - the part where I was apparently living in the dark, or even worse, the past! Yikes! Seems I may be losing my touch. I got a call from my manager one day last spring asking me to meet with a cutting edge production company in L.A. (http://deca.tv/) about being a host of a new cooking web series called Good Bite (http://goodbite.com/). “Web series?!” I asked, already conjuring up inventive excuses to get out of the meeting. “Web series,“ she reiterated, in a tone that I knew better than to argue with. Perhaps this is a good time to mention that my nickname for my manager is “Momager;” you know, like Dina Lohan or Terri Shields. Anyway, I did what I was told, met with the production company and loved what I heard! On my way home from the meeting, stuck in traffic on L.A’s 405 freeway I called my manager to say, “Get me this job! I have to be a part of this.”
Perhaps one of the coolest things DECA is doing with the creation of Good Bite is bringing together America’s top food bloggers for lively online video discussions about all things food and cooking, along with demo videos from myself and the other Good Bite hosts. And what an honor it is to be working along side such an esteemed group. Each 2-minute episode of the show makes delicious food easy, provides accessible recipes and solutions for home cooks and an opportunity for you to become part of the discussion. The Good Bite website is focused on finding the very best in food and bringing it to you in a fresh and inventive way.
All I can say is it’s a good thing I didn’t let the phone go to voicemail the day my Momager called about that fateful meeting. Turns out she had some news for me... about the future.
Caramelized Balsamic Onions
& Smoky Chipotle Ketchup
Serves 6
FOR THE BURGERS
2 1/4 pounds ground brisket
2 egg yolks
2 tablespoons steak sauce (recommended: A1 Brand)
1 1/2 teaspoons kosher salt
2 teaspoons freshly cracked black pepper
3 tablespoons cold, unsalted butter
FOR THE ONIONS
1 pound red onions, cut crosswise into 1/4-inch rings
2 to 3 tablespoons extra virgin olive oil
Freshly cracked black pepper, to taste
Kosher salt, to taste
2 tablespoons aged balsamic vinegar
FOR THE KETCHUP
1 cup ketchup
1 to 2 teaspoons canned chipotle peppers*, seeded and diced, or to taste
1 to 2 tablespoons adobo sauce from can, or to taste
2 teaspoons aged balsamic vinegar
Kosher salt & freshly cracked black pepper, to taste
FOR THE TOMATOES
6 Roma tomatoes
Olive oil for drizzling
Kosher salt & freshly cracked black pepper, to taste
FIXIN’S
6 Brioche Rolls or good hamburger buns, split, cut side toasted or grilled
6 thick slices sharp cheddar cheese
2 cups baby arugula leaves
1 ripe avocado, peeled and sliced
To caramelize the onions, heat oil over low heat in a large skillet. Add the onions and cook, stirring frequently, for 20 minutes or until soft and deep golden brown. Don’t rush this part. It really does take about 20 minutes to develop the sugars and caramelize the onions. Trust me, your patience will be rewarded. They key to success is low and slow. Season with salt and pepper and add the balsamic vinegar during the last couple of minutes to deglaze the pan. Can be made 3 days ahead. Cover; chill.
Preheat the oven to 400 degrees.
Slice the tomatoes in half lengthwise and remove the seeds. Spread tomato halves on a sheet pan and drizzle with olive oil. Season generously with salt and pepper and toss together to ensure everything is coated evenly. Roast for 45 minutes, cut side up, without turning, until the tomatoes are concentrated and caramelized. Can be made 3 days ahead. Cover; chill.
To make the ketchup, Stir together the ketchup, chipotle peppers and adobo sauce in a small bowl. Whisk in the vinegar and season with salt and pepper. Can be made 3 days ahead. Cover; chill.
To make the burgers, whisk together the egg yolks, steak sauce and salt and pepper in a large bowl. Add the ground brisket and put a touch of olive oil on clean hands to keep meat from sticking and to prevent over mixing. Carefully work the meat with your fingertips until just combined. It’s important not to overwork the meat, doing so results in a tough burger. To form patties, shape a loose ball in your hand and press half a tablespoon of the cold butter into the center of the meat. Lightly form each hamburger with the balls of your hands making sure the butter is entirely encased, but don’t pack the meat. The more you pack, the denser the burger will be and it will leave more potential for shrinkage. The burgers should be half an inch thick. Season both sides of the burgers with salt and pepper.
Heat an outdoor grill or indoor grill pan to medium-high.
Grill the burgers for 5 to 7 minutes on each side to desired doneness. Remove to a plate, add cheese and cover with aluminum foil. Allow the burgers to rest for 5 minutes and serve immediately on buns with desired fixin’s.
Print Recipe
Monday, June 22, 2009
Peach Crisp & Therapy

I blame it all on my Mother. She was the queen of the perfect pie crust, hands down. People would rave when they tasted it, they’d marvel at the flaky texture and the perfect golden color. They’d inevitably ask for the recipe. She’d share it with them gladly. There wasn’t much to it, after all, just flour, salt, fat and ice water. “The same things I use!” they’d say. Ah yes, but the “secret,” she’d tell them with a Bree Van de Kamp-esque smile, lies in the technique. Ice-cold ingredients and never, ever roll out the crust more than once or it will be tough. Couple that with the fact that I never did get the Easy Bake Oven I so desperately wanted as a kid and you can see how my Mother single-handedly scared me off of making pie pastry for life! Or at least until my twenties, when after years of therapy for my culinary self-esteem I gathered the courage to attempt it again without fear of failure or judgment.
I'm kidding. Kinda.
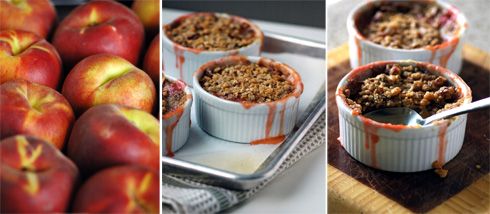
While I’m happy to report that I’m no longer intimidated by pie pastry, I’m also not afraid to admit that I tend to favor quick and easy in the kitchen (something pie pastry doesn’t have going for it). I suppose this is my not-so-subtle way of admitting that I’m sorely lacking in the pastry-patience department, especially on hot summer days when I’d rather be anywhere but kitchen-bound, saddled with a rolling pin. That’s doesn’t mean however, that I’m not always up for a good homemade dessert, especially one that takes advantage of the beautiful stone fruits of the season. Enter: Peach Crisp!
Crisps, crumbles and cobblers, in the summer in particular, are wonderful things and require no further embellishment other than perhaps, a scoop of good vanilla ice cream. They are the essence of all that is desirable of the season and they satisfy my constant, if nagging need - yes need - for something homey and sweet. To further bolster my case, crisps are a mere fraction the effort of pie and you get all of the pay off without all the work of pie pastry - or the therapy bill it can bring.
Whew! Dessert handled. Culinary self-esteem intact.
This recipe is from my good friend Susan Cox of Dana Point, California. Or as she’s affectionately known, my Real OC Housewife! Thanks, Susan!
 Serves 6
FOR THE FILLING
6 cups peaches, peeled and sliced (about 2.5 lbs)
¼ cup granulated sugar
¼ cup light brown sugar, lightly packed
3 tablespoons all-purpose flour
1 tablespoon freshly squeezed lime juice
FOR THE TOPPING
¾ cup all-purpose flour
1/3 cup light brown sugar, lightly packed
¼ teaspoon kosher salt
6 tablespoons cold unsalted butter, cut into pieces
¾ cup English toffee bits (like Skor or Heath)
½ cup pecans, toasted and coarsely chopped
Preheat the oven to 350 degrees.
Place six 1¼ cup ramekins on a baking sheet lined with parchment paper; set aside.
Meanwhile, immerse the peaches in boiling water for 30 seconds, then place them in a bowl of ice water. Peel the peaches and slice them into thick wedges and place them into a large bowl. Add the sugar, brown sugar, flour and lime juice and blend well. Divide filling evenly among ramekins.
To make the topping, whisk flour, brown sugar and salt in bowl to blend. Using fingertips rub in butter until mixture hold together in clumps. Stir in toffee and pecans; sprinkle over filling.
Bake Crisps until filling bubbles and topping is golden brown, about 40 minutes. Cool 10 minutes. Serve warm with ice cream if desired.
Print Recipe
Monday, June 15, 2009
To Brine or Not to Brine: That is the Question
This is my rebel yell in recipe form in support of the pork chop. For some reason it just doesn’t get the respect it deserves. And it’s no wonder, when you see the pitiful displays of wafer-thin chops laid out in grocery store meat cases across the country. It doesn’t do much to inspire gastronomic creativity or debunk the myth that pork chops are dry, chewy and generally flavorless. I can’t pretend I haven’t been the recipient of a few tough, overcooked pork chops that could have passed as shoe leather in my day, no matter how much shaking and baking was involved! However, in my never ending pursuit of culinary enlightenment I’ve figured out a few things along the way that make all the difference.
1. Forget those wafer-thin pork chops in your grocer’s meat counter. Pork is bred so lean these days that it’s nearly impossible to cook something that thin without drying it out. Instead, become fast friends with the guy behind the meat counter. Ask him to cut you some nice, thick (I’m talking 2-inch thick) center-cut chops. This is the first step to changing your relationship with pork chops. I know it can be a bit intimidating talking to the gruff-looking guy behind the counter wielding the meat cleaver and sporting the bloody apron, but he doesn’t bite and special requests are actually a part of his job.
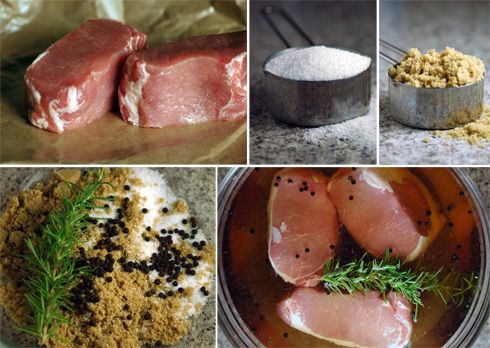
2. Brining is key. Admittedly, this requires a bit of foresight in your menu planning since the chops need to hang out in the brine for a minimum of 8 hours, but 24 is preferred to get the maximum flavor and benefit. If you’re not familiar with brining it’s an uber simple process of creating a salty solution infused with aromatics that not only give the meat big flavor from the inside out, but keep it incredibly tender and juicy. Trust me: once you’ve used this method you’ll never go back. (See recipe below).
3. What ever you do, DO NOT overcook your meat! You can brine your pork chops for a week, but if you overcook them, it's not going to matter. A perfectly cooked pork chop is actually (lean forward people) still slightly pink in the center. It should be cooked to 145° to ensure tender juiciness. I know that some of you are still adhering to your Grandma's rule that pork has to be well done otherwise, "You could end up with trichinosis!" Hmmm, perhaps now we know where pork chops that bear more of a resemblance to footwear than food came from. I know it's hard to question Grandma's wisdom, but not unlike the moment you came to grips with the truth about Santa Claus, you'll come to accept this one too. Sorry, Grandma.If I’ve done my job effectively, hopefully I’ve convinced you to get out there and try pork chops again for the very first time. Especially when they're Brown Sugar-Brined Pork Chops with Caramelized Onion and Peach Marmalade. And for the record, the brining question? Strictly rhetorical.
Grilled Brown Sugar-Brined Pork Chops
with Caramelized Onion Peach Marmalade
 Serves 4
FOR THE BRINE
7 cups warm water
¼ cup kosher salt
½ cup packed light brown sugar
1 sprig fresh rosemary
3 teaspoons black peppercorns
4 boneless, center-cut pork chops (each about 2 inches thick)
FOR THE MARMALADE
2 tablespoons extra-virgin olive oil
4 cups sliced sweet onions (Vidalia or Maui)
2 cups chopped peeled peaches, fresh or frozen
1/3 cup granulated sugar
3 tablespoons red wine vinegar
2 teaspoons fresh rosemary, chopped
Kosher salt and freshly cracked black pepper, to taste
In a large bowl combine the salt, brown sugar, rosemary sprig and peppercorns. Add the warm water and stir until salt and sugar are dissolved. Allow water to cool slightly and place pork in brine and set a plate on top to keep meat completely submerged. Cover with plastic wrap and chill at least 8 hours or overnight.
To peel the peaches, bring a pot of water to the boil. Meanwhile, fill a large bowl with ice water to have at the ready. Plunk the peaches into the boiling water and let them go for roughly 45 seconds to a minute. Remove the peaches and immediately plunge into the ice bath. When they're cool enough to handle gently peel away the skins.
To make the marmalade, heat the oil in a large skillet over medium heat. Add onions and cook over low heat, stirring often, until transparent and starting to caramelize, 15 to 20 minutes. Add peaches, granulated sugar and vinegar. Cook, stirring often, until the peaches start to break down and the marmalade is caramelized and sticky, about 15 minutes. Stir in the rosemary and season to taste with salt and pepper.
Preheat an outdoor grill or indoor grill pan to medium-high heat.
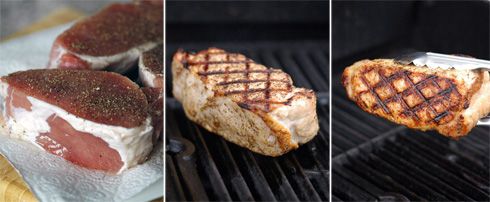
Remove pork from brine and pat dry with paper towels. Brush pork lightly with olive oil and season generously on all sides with pepper. Extra salt isn’t necessary because of the brining process.
Grill pork chops, covered, turning once, until meat is done, but just slightly pink in the middle (145° on an instant read thermometer). Transfer pork to a platter, tent with foil, and let rest 5 to 10 minutes. Serve with marmalade.
Print Recipe